Do you have a room or two in your house with a few major pain points? I’m sure most people do. If you had the money, time and resources, you’d rip the whole thing down to the studs and start over, right? But reality is life is expensive these days and circumstances don’t always (or hardly ever) allow for that pain point to be just ripped out and replaced.
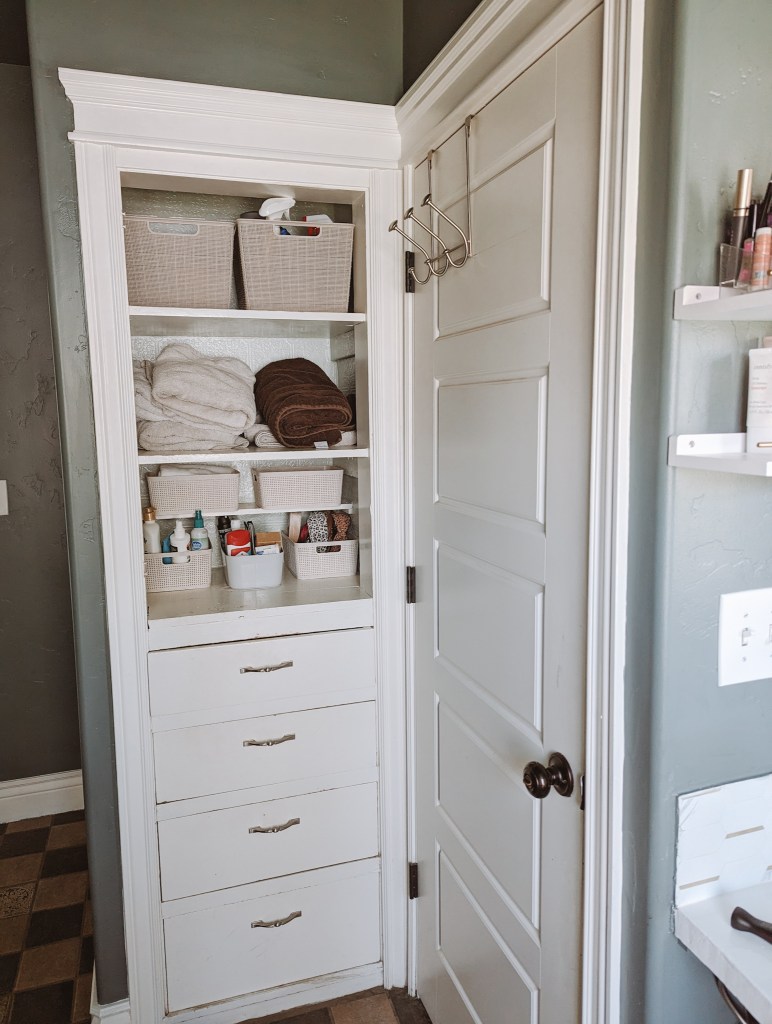
I have found myself in this particular position with our primary bathroom, which also jack-and-jills to be the main bathroom for the house. See, it has the worst layout, but then again our house was built in 1908…so its to be expected. The bathroom is narrow, and has dysfunctional built ins, that one of the the doors swing into. This built in is the only storage in the whole bathroom. So picture this, I am getting my toothbrush out, or my makeup, and someone walks in. The door hits the open drawers and me and this scenario played out multiple times a day. Because we all know moms don’t go to the bathroom to be alone.
The whole goal was to move all things I used the most out of the built in. This project was kind of a “give a mouse a cookie” situation. Well, if I’m going to put up storage, I should probably paint. If I’m going to paint, maybe I’ll pain the counter top too…if I do that, I probably should try out that peel and stick tile for the backsplash. Truthfully though, since the jewelry business tanked our finances have been tight, as one would expect. So I really needed to do this facelift on a budget.

So I started with all the left over paint that is sitting in the basement. Grabbed a 5 gallon bucket from the garage and started mixing. It all mixed into a pretty deep green with a hint of blue. I had also grabbed this tub and tile paint. I will say, I did not love how it covered the tile. I felt like the coverage wasn’t that great, which led me to peel and stick tile. The exact one I used is now sold out. Here’s a link to a similar tile at a similar price point. I felt like the tub and tile paint covered the counter great though! It has been two months and it has held up perfectly.

Before pictured above.

You can see the tile either needed a third coat or something different. So I went with the peel and stick! Also, she was so excited to help me on this project. 🤍
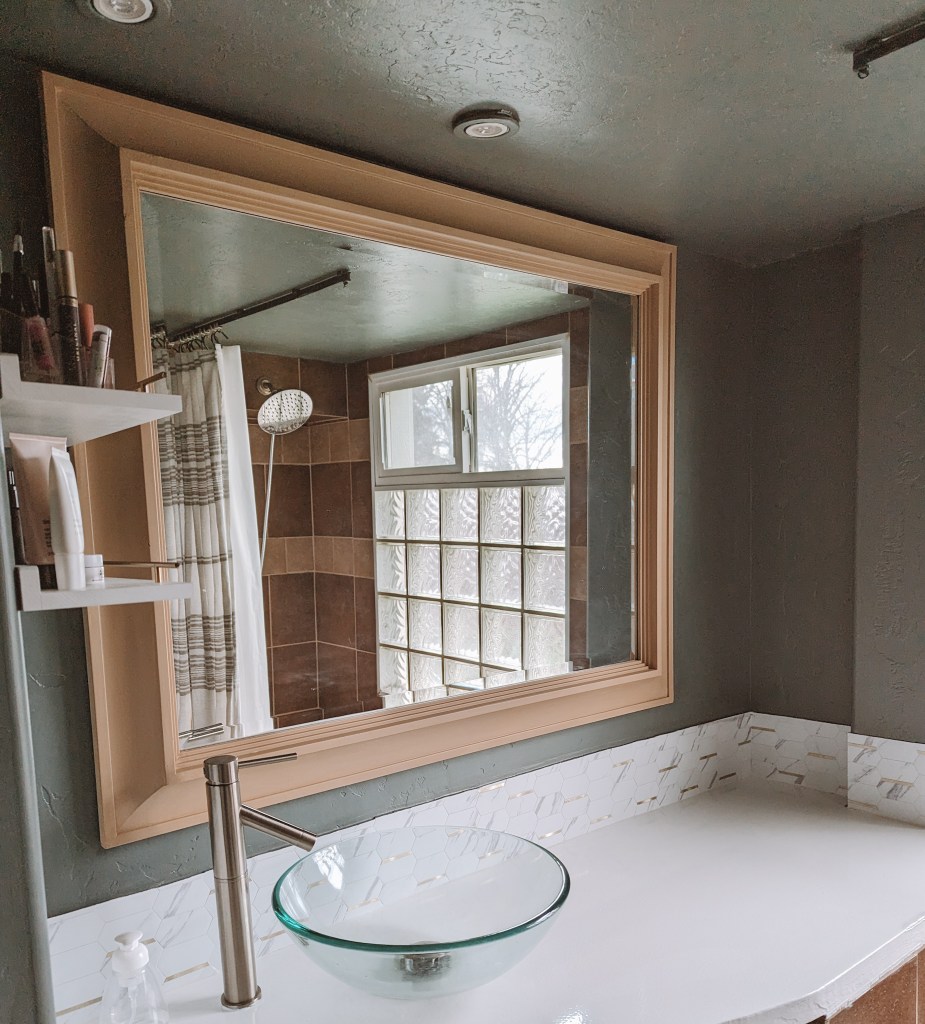
The after!!!
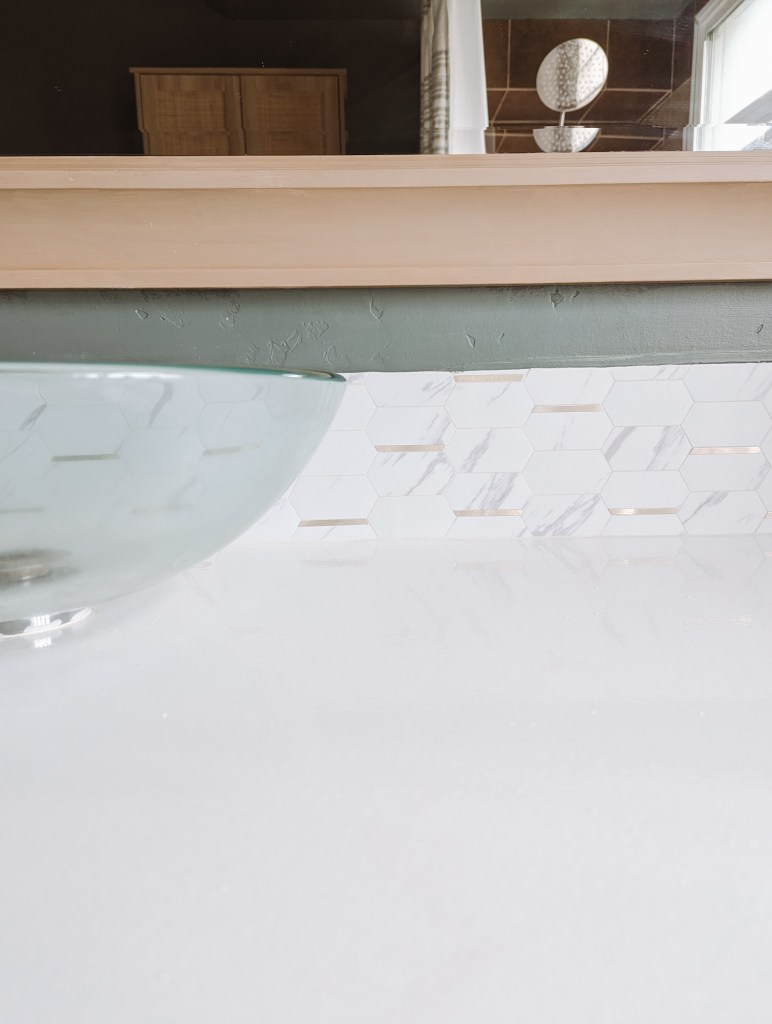
I did grout the peel and stick tile, per the instructions. Not all peel and stick requires grout, but this one did. I used pre mixed white grout and I picked up at Home Depot. I also used a product called Retique It on the mirror frame. I have used this before and absolutely love the transformation that happens when you use it. Retique It is a liquid wood. You use the base, and then apply the stain. I used the color Pickled Oak, You can apply any gel stain on top! It does not have to be the Retique it brand. I used a paint brush to apply it. (I did not use the graining tool.)
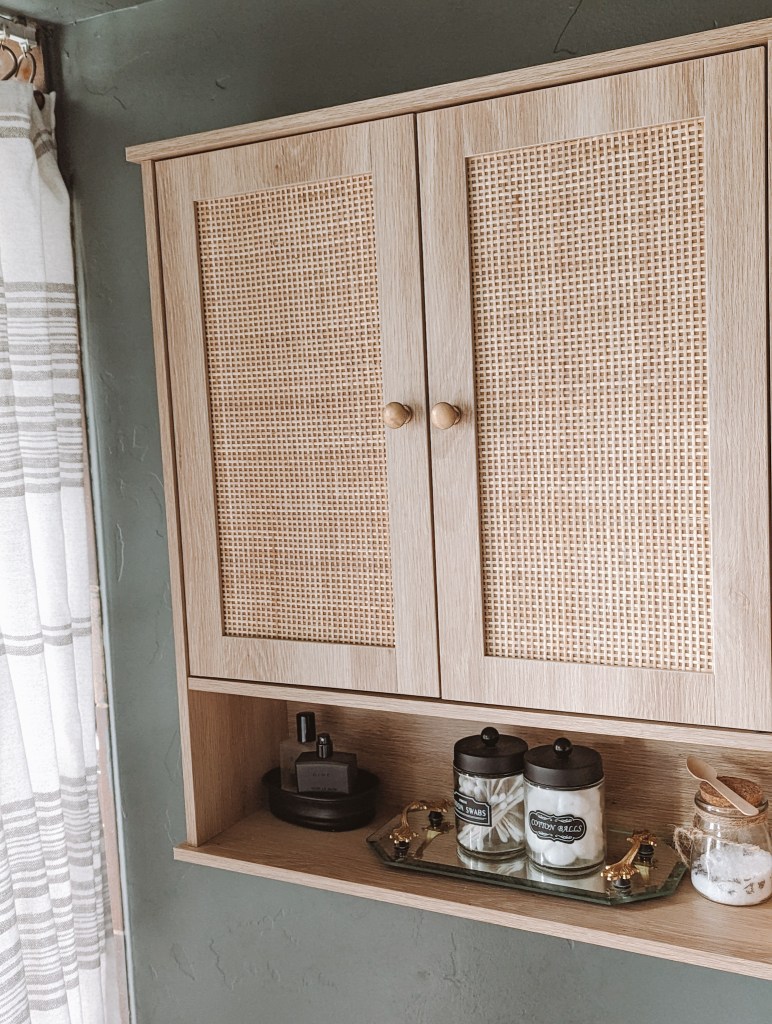
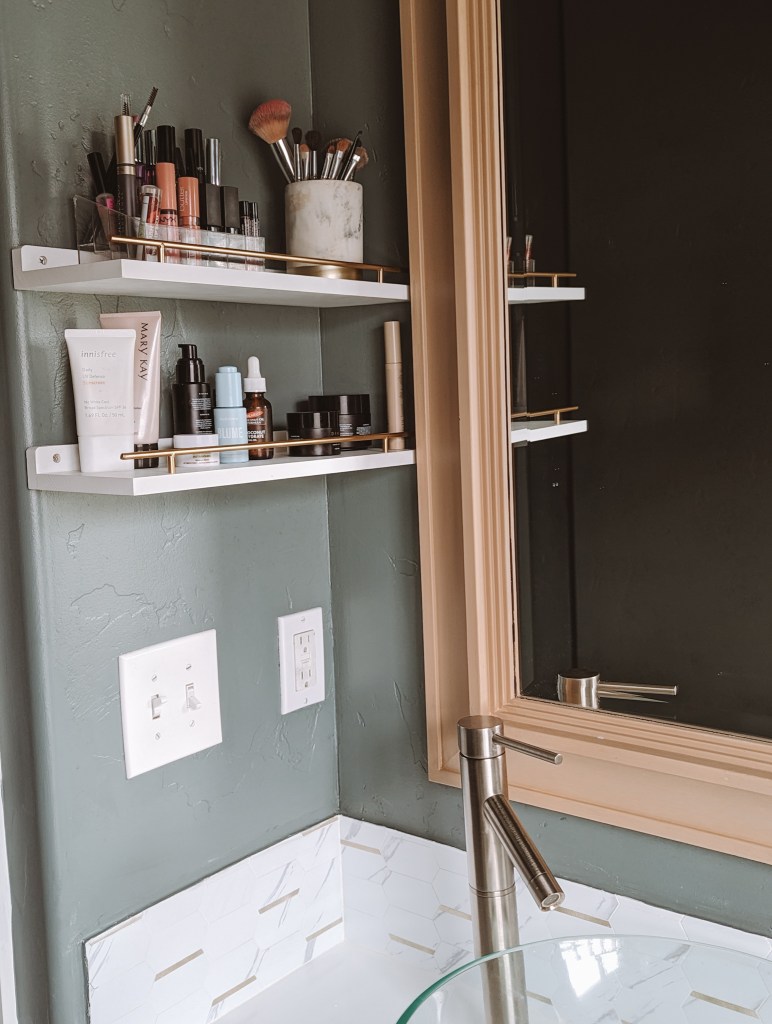
Lastly, I added a small cabinet and shelving, since that is what started the whole makeover! Those two items have transformed the functionality of this space! The refresh on the look of the bathroom was purely for aesthetics, but I love it! I love the space again and feel like it is already proving so much more functional.
Here’s the cost breakdown-
Peel and stick tile $30 (similar tile)
Retique It $65 (I bought more than I need because I want to use it on more projects) Primer, Gel Stain
Grout $10
Total: $237.19
Hopefully this inspires you to be able to tackle pain points without the big budget. It can be done and you can transform your space into something you really love.